BACKGROUND:
Beautiful Oops is a children’s book written by author Barney Saltzberg. In the book, Saltzberg teaches kids that it is okay to make mistakes. Mistakes should even be celebrated as they can lead to new discoveries, creations, and adventures. This can be a hard concept for kids and even adults to grasp when it comes to art. Most artists have a vision of what they think their work should be and want to stick with it. However painters such as Bob Ross have preached the same idea as Saltzberg. He is known for his saying “we don’t make mistakes, just happy little accidents” and that is truly the spirit of this book and this Beautiful Oops art lesson.
OBJECTIVE:
1. Discover how to use marks on paper to create art.
2. Create objects or forms on paper.
3. Refine fine motor skills using crayons or oil pastels.
4. Teach students that mistakes are okay and it is important to see the positive side of situations.
NATIONAL CORE ART STANDARDS:
Anchor Standard #1
-Generate and conceptualize artistic ideas and work.
Anchor Standard #3
-Refine and Complete artistic work.
Anchor Standard #5
-Develop and refine artistic techniques and work for
presentation.
INSTRUCTIONS:
Have students sit on the carpet and introduce the title and author of the book – Beautiful Oops by Barney Saltzberg. Discuss what the word oops means. When do people use it? Share a story where you spilled milk in the morning and have the students guess what work you used when that happened. Was it oops? When would you use the word oops in art? Read the book – explain vocabulary words spill, drip, smudge, smear, stain and scribble as they appear in the book. Explain meaning of pattern – when something repeats itself, like line dot line dot. And then introduce the art project.
Explain to students that they will each get the chance to create their own beautiful oops, and make a masterpiece out of what some would see as a mistake.
Step 1:
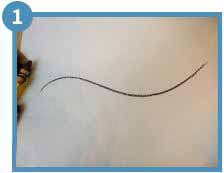
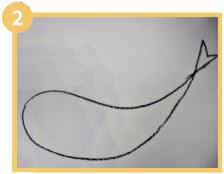
Make a mark on the paper using a black crayon. Turn the paper to different sides to look at the mark and discuss with students about what it can be changed into. Demonstrate and discuss how to change that mark into creating something new – an object or a form. (For example – a scribble with crisscross lines can change into a fence with a flower. Show how to add details like leaves, other flowers, soil etc. and then colors). Show examples of how marks can be changed into something different.

Step 2:
Discuss what they could change their mark into. Have them turn their paper to the different sides to get ideas. Let them really get creative with this. As Saltzberg shows, there are unlimited possibilities of what a single oops could be turned into. It all depends on the mind of the artist.

Step 3:
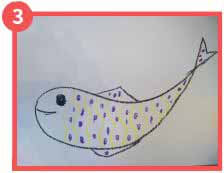
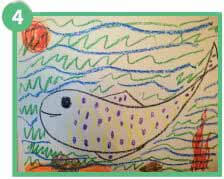
Have them add details and colors using their crayons or oil pastels. Remind them to be daring with their details. It is impossible to mess the picture up because any oops can be incorporated into the drawing and turned into something even more interesting.

Step 4:
Have each student share with other students at their table where they made their oops, what they did next and what they changed it into. They’ll begin to realize that their peers can’t even tell where the oops is.

HELPFUL RESOURCES:
Beautiful Oops by Barney Saltzberg on Amazon