OBJECTIVE:
The objective is to teach students proper placement of facial features in portraiture, review warm and cool colors and basic lines.
Anchor Standard #1
-Generate and conceptualize artistic ideas and work.
Anchor Standard #2
-Organize and develop artistic ideas and work.
Anchor Standard #3
-Refine and Complete artistic work.
Anchor Standard #5
-Develop and refine artistic techniques and work for presentation.
INSTRUCTIONS:
Throughout the ages, portraits have been created in many different ways. Portraits may be paintings, drawings, photographs, sculptures and even mosaics. There are portraits that are thousands of years old such as Egyptian tomb paintings and the mosaics of the ancient Greeks and Romans. There are very modern portraits such as those created by the artists David Hockney and Yayoi Kusama! A self portrait is one you do of yourself. Today we will be observing the proper facial feature placement and will create self portraits that are not perfect copies of ourselves, but will definitely have elements of ourselves in them!
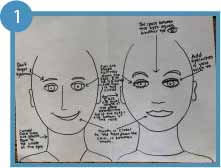
Step 1:
The face shape we will use today is an oval. We will leave the top of the oval unfinished so we may place hair there. Today we will place the facial features in the correct places on the face:
-The eyes are halfway down the face. The eyebrows are a small amount of space above the eyes and there is a curved line inside the eye that is showing our eyelid. If you wish to place eyelashes, they would be on the curved line. Eyes are placed with enough space in between them for another eye!
-We will make a very simple nose . It could be in the shape of an L or just a small curved line. The bottom of the nose is halfway between the eyes and chin.
-The mouth is 1/3 of the distance between the nose and the chin and it is closer to the nose than the chin. You could make any kind of smile you wish ! There are many different kinds of lip shapes, choose one that’s comfortable for you to draw.
-Ears are on the side of your head, placed equal to the distance between the eye and the bottom of the nose. If you usually have your hair over your ears you do not need to draw them.
– The lines for your neck are curved and start equal to where the outer part of your eye is. If you have room continue the line to make shoulders. You may add a neckline of a shirt that is a V or curved line.
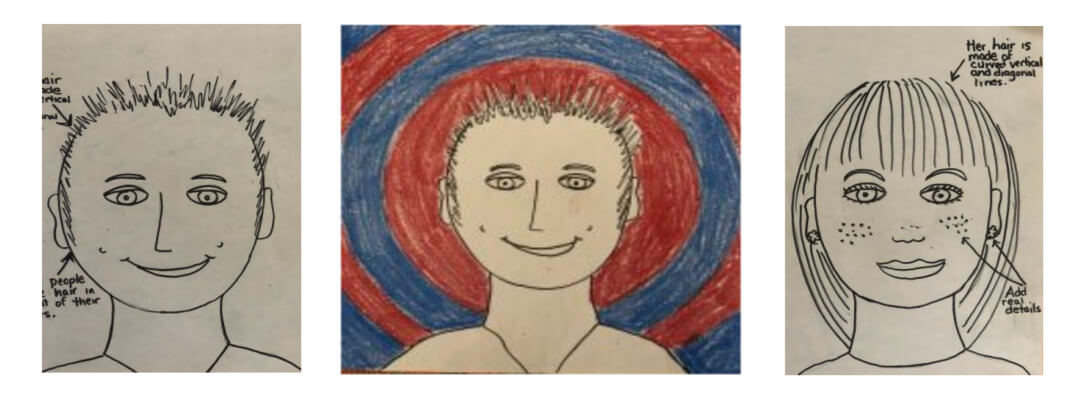
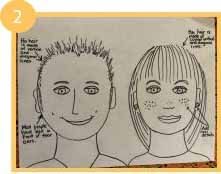
Step 2:
Next we will add the details to your picture that make you distinctly you! When you draw hair you are making lines that are curved, vertical or diagonal or dots or a combination of these. Make sure you do not give yourself a flat head! Think about your hair- is it straight? Is it curly? Is it wavy? Is it spiky? Is it cut very close to your head? Do you have bangs? Do you have a side part? Is your hair long? Is it short? Is it shoulder length? Do you wear it in braids? Do you wear it in a ponytail? Do you always wear a bow or headband?
Next think about other details of your face- braces, dimples, freckles, beauty marks, glasses (think about the frame shape), earrings, necklaces, we will draw these in now.
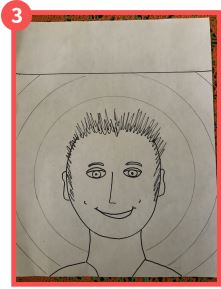
Step 3:
Using pencil and the circle stencil, very lightly trace three circles onto the background. Make sure you do not draw the circles into your face, hair or upper body.
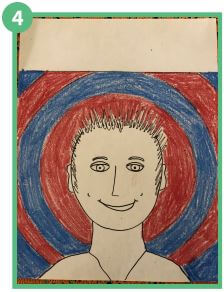
Step 4:
We will color these bands in an A-B pattern using a warm (red, yellow, orange) and a cool (blue, green, purple) color crayon. Press firmly so your color shows well and really makes your self portrait pop!