Background:
Georgia O’Keeffe was an artist and painter who was born on November 15, 1887 in Sun Prairie, Wisconsin. She was given art lessons (which was uncommon for girls at this time) and began creating art at a young age. She then went on to study at the Art Institute of Chicago in the early 1900’s. She is well known for her striking flower paintings where her interesting vantage points depicted her subjects as simple, but strong. O’Keeffe was one of the greatest American artists of the twentieth century.
OBJECTIVE:
The student will be able to use vantage point and scale to create flowers in the style of artist Georgia O’Keeffe.
Anchor Standard #1
-Generate and conceptualize artistic ideas and work.
Anchor Standard #2
-Organize and develop artistic ideas and work.
Step 1:
Discuss “Vantage Point”. A vantage point is where you think the artist seems to have been standing when they were creating the art. The students will be looking down at the flower and drawing what they see from THEIR vantage point. Also discuss scale- O’Keeffe used a large scale to draw her flowers in order to make them look much bigger than they were. Explain to students that they will be drawing the flower as if they were zooming in on it. Have them think BIG! Georgia O’Keeffe painted her flowers large so even a delicate subject came across as strong and powerful.
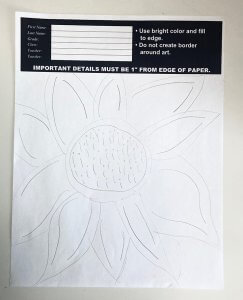
Students can use many different varieties of flowers, it isn’t the type of flower that is important, but more so the scale and vantage point of the drawing. Have them start in the center of the flower by drawing a circle and then work their way out to create petals. Lightly in pencil, begin to draw the outline of the flower.
Instruct that the students MUST touch all sides of the paper with their object, and part of the petals will look like they fell off the page. Encourage them to use organic shapes and curved lines to make the flowers look more natural. Discuss how petals of flowers OVERLAP each other and how the student should not be afraid to draw their petals overlapping. Finally, encourage students to add details, like lines and ridges on the petals and pollen in the center to show a flower’s natural texture.

Step 2:
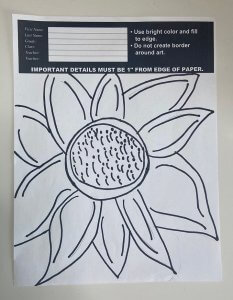
Once the student is happy with their Georgia O’Keeffe Paintings outline, have them trace over the outline in marker. If they want the edges of the petals to stay crisp and defined, use a permanent marker (ex: Sharpie). If they want the edges of the petals to blend more, they can use a non-permanent washable marker. The water will make the washable marker run and blend with the paint colors, so it is best to use a colored marker (not black) if taking this approach.

Step 3:
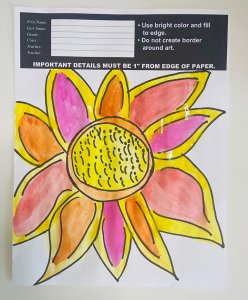
With watercolors, begin painting the petals in the desired colors. Again, have the students start in the center of the flower and paint out from there. Encourage students to use analogous colors on their flowers and petals so that the paint doesn’t blend together and create brown. For best results, have students use either only warm (red, orange, yellow, hot pink) or only cool (blue, green, purple) analogous colors for the flower. Allow students to blend the colors together to create a natural effect.

Step 4:
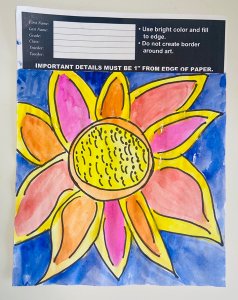
Once the flower and petals are dry, have students paint the background of the flower. Make sure to paint a bright contrasting color in the background so that the whole page is filled with color. Remind students to use CONTRAST and paint the background a color that is different from the color of the flowers. If students used warm colors to paint the flower, have them use cool colors for the background and vice versa for best results.

CHECK THIS OUT:
The Georgia O’Keeffe Museum
https://www.okeeffemuseum.org/about-georgia-okeeffe/