BACKGROUND:
Talk about “horizon lines”, “vanishing points” and “perspective”. A horizon line is the imaginary “line” that forms where the sky meets the earth. Perspective is the illusion of the three-dimensional world on a two dimensional surface. It creates a sense of depth so that a scene on paper looks more realistic. This illusion is created by having objects in a scene get more narrow as they reach your “vanishing point”. A vanishing point is the spot you choose to have all the vertical lines eventually reach.
If you would like, you can display the above pictures of the train tracks and the telephone poles leading to a vanishing point in the mountains, to illustrate how all vertical lines (even the imaginary lines that your eye draws for your brain, like top of fence posts- each posts gets a little smaller to follow an imaginary line to the vanishing point) reach a vanishing point.
NATIONAL CORE ART STANDARDS:
Anchor Standard #3
-Refine and complete artistic work.
Anchor Standard #5
-Develop and refine artistic techniques and work for presentation.
Anchor Standard #10
-Synthesize and relate knowledge and personal experiences to make art.
Step 1:
In pencil draw a horizon line. The line can be wavy to symbolize hills or straight. This separates your land from your sky.
Step 2:
VERY LIGHTLY in pencil, pick a vanishing point and draw a little dot on your paper, the spot can be right on the top edge of your sheet (as shown above-the vanishing point is shown in red), or more centered, but later be erased.
Step 3:
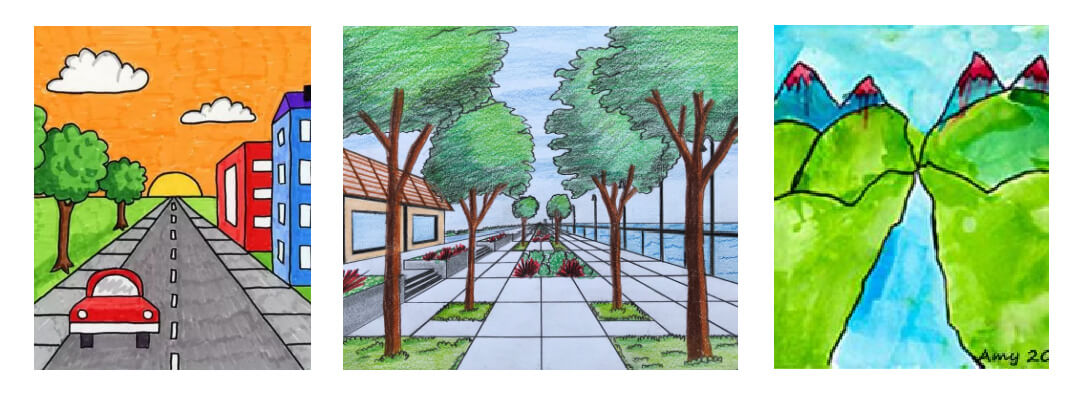
Now you can instruct the students to start using vertical lines to divide their landscape. The vertical lines do not necessarily have to be straight and can be drawn to form a stream, farming hills, roads, or whatever else they can dream up, but all of these lines should go to their vanishing point, as shown in the illustration above (in Grey). If the black lines continued, they would all hit the vanishing point. The students can create their lines with rulers or freehand, as long as they all appear to be heading towards their vanishing point.
Step 4:
Next, the children should further decorate their scene. Younger students could divide up the vertical lines drawn on their hills into sections, and color each section a different color and design. They can also add hills and trees across the horizon line. Instruct them to erase their vanishing point and let them use their creativity with all kinds of color!
Older or even more advanced students can draw buildings or trees along the vertical lines also- be sure to tell them to remember that each image they draw will get smaller as it gets closer to the vanishing point. To make it easier, it they would like, they can VERY LIGHTLY draw a line as a guide that the top of their objects would follow, and erase it when they are finished. Next, they too would erase their vanishing points and paint, paint, paint!
CHECK THIS OUT:
For More Information On One Point perspective Art Lessons Click: https://www.pinterest.com/plubrano/1-point-perspective/